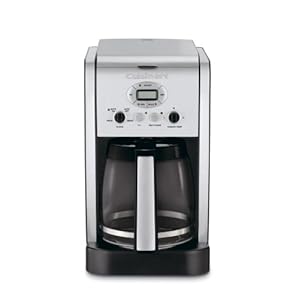
The Cuisinart DGB-900BC Fully Automatic Burr Grind & Brew Thermal Coffeemaker
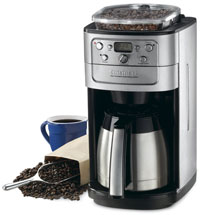
The Cuisinart Burr Grind & Brew Thermal Coffeemaker
The
burr mill grinder in the new Fully Automatic Burr Grind & Brew
Thermal Coffeemaker is responsible for the superior coffee flavor that
you can experience. Add to that the pleasure of choosing the flavor
strength you like best, easy-to-use controls, and a thermal carafe that
keeps coffee hot and fresh for hours and you'll understand why we say
this Cuisinart coffeemaker is a grind above the rest.
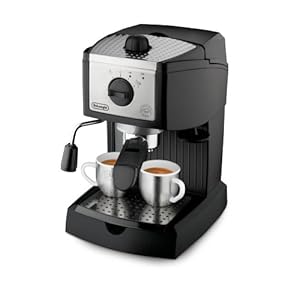
The Quest for a Perfect Espresso
It is generally agreed that there are four basic elements critical to the perfect cup:
Element 1. Water:
Coffee is 98% water. Often overlooked, the quality of the water
is as important as the quality of the coffee. A good rule of thumb is
that if your water doesn't taste good from the tap, it won't taste any
better in your coffee. That's why Cuisinart has added a water filter to
the Fully Automatic Burr Grind & Brew Coffeemaker. The charcoal
water filter removes chlorine, bad tastes and odors, for the purest cup
of coffee every time.
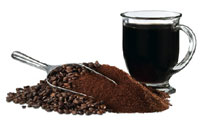
Element 2. Coffee:
While the bulk of the liquid is water, all of the flavor should
be from the coffee. To achieve the same great quality of coffee you
receive at a coffee bar, you need to use the same quality beans. Buy the
beans fresh and whole, only about a two weeks' supply at a time for
maximum freshness. Once the coffee bean is broken, its flavor degrades
very quickly. That's why the Fully Automatic Burr Grind & Brew
Coffeemaker grinds your coffee just prior to brewing. If it is not
practical to buy small supplies, we recommend you separate larger
amounts of beans into one to two week portions immediately after
purchase, and freeze them in airtight containers. The best way to
maximize freshness is to minimize exposure to air, light and moisture.
So, once beans have been removed from the freezer, maintain them in a
sealed container at room temperature, since damaging condensation occurs
every time the beans are removed from the freezer or refrigerator. Note
that some coffee experts advise against freezing dark-roast beans,
because freezing can cause the oils to coagulate. Other experts
disagree. We suggest you experiment and decide yourself. We recommend
keeping the hopper at least half way full. Be sure that you have
sufficient amount of beans in your hopper for the amount of coffee you
intend to brew. Although it is preferable to use fresh, whole beans, you
can make coffee in the coffeemaker using pre-ground beans. To do so,
turn off the grinder by pressing the Grind Off button before turning on
the unit. It is suggested to use 1 level scoop of ground coffee per cup
and adjust the amount to your taste. The maximum capacity for ground
coffee is 16 level scoops, using either a paper or permanent filter.
Exceeding this amount may cause overflow.
Element 3. Grind:
The grind of the coffee is critical for proper flavor extraction.
If the grind is too fine, over extraction and bitterness will result.
Too fine a grind may also clog the filter. If the grind is too coarse,
the water will pass through too quickly and the desired flavors will not
be extracted. The Fully Automatic Burr Grind & Brew Coffeemaker is
preset for a medium grind, the optimal grind for this type of
coffeemaker.
Element 4. Proportion:
The Fully Automatic Burr Grind & Brew Coffeemaker makes up to twelve cups of (54 ounces) of coffee.
Making Coffee with Whole Beans

12-cup thermal caraffe
- Fill the Water Reservoir:
Open the reservoir lid. Pour the desired amount of water in the
reservoir using the water level window indicator. Close the reservoir
lid. Note: Do not exceed the 12-cup line; doing so may cause the carafe
to overflow.
- Add Beans:
Lift
the hopper lid, using the recess on either side. Fill the hopper with
beans. It is recommended keeping the hopper at least halfway full. Be
sure that you have a sufficient amount of beans in your hopper for the
amount of coffee you intend to brew (maximum capacity is 1/2-pound Do
not over-pack the hopper. Over-packing may result in jamming the
grinder.) For easy filling, the hopper container can be taken out by
turning the hopper container release knob to the unlock position. Note:
Do not put any water in the unit once the hopper container has been
removed. If the water gets into the grinder motor, the motor may become
damaged and may malfunction. Put hopper lid back in place.
- Lock Hopper:
If you have removed the hopper from the unit, be sure that the
hopper container release knob is in the unlocked position and place the
hopper container back in the unit. Turn the knob to locked position.
This unit is equipped with a safety interlock system. The unit will not
grind if the hopper container is not in place. If you try to turn on the
unit for grinding with the hopper out of place, the unit will beep
continuously until the missing part is installed. The brewing process
can be restarted by pressing the On button. Restarting the process will
not affect coffee results.
- Insert Coffee Filter:
Open filter door by pressing filter basket door release button.
Remove filter basket cover and place a #4 basket paper filter or
Cuisinart's commercial style permanent filter in the basket. The unit is
equipped with a safety interlock system. The units will not operate if
the filter basket cover or filter basket are not in place or if the
filter door is not closed. If you try to turn the unit on while the
filter compartment is out of place, the unit will beep continuously
until the missing part(s) are installed.
- Brewing:
- Immediate Grinding and Brewing:
- Turn
the Grind Control Knob to select the number of cups you want to brew.
The coffeemaker will grind the corresponding amounts of beans. The unit
will automatically adjust for low cup settings.
- Press the Strength Control button to set the coffee strength. MILD, MED or STRONG will show on the LCD display.
- Press the On button. The indicator will light and process will begin.
- Programmed Brewing:
Press the Program button. The indicator will light and the
display will show the programmed time for as long as the button is
depressed. The display reverts back to the time of day once the button
is released.
- Turn the Grind Control knob
to select the number of cups you want to brew. The Coffeemaker will
grind the corresponding amount of beans. The unit will automatically
adjust for low cup settings.
- Press the Strength Control button to set coffee strength. MILD, MED or STRONG will show on the LCD display.
- The coffeemaker will begin brewing at the programmed time.
- During and After Brewing:
The Brew Pause feature allows you to remove the carafe from the
resting plate during mid-brew. The brewing process does not stop during
this period; only the flow of coffee from the basket stops. Do not
remove the carafe for longer than 20 seconds or the coffee may overflow
the basket. While Cuisinart offers this feature, it is not recommended
that you pour coffee before the cycle has reached completion, since the
coffee brewed at the beginning of the cycle has a flavor profile which
is very different from the coffee made at the end of the cycle. Removing
the cup during the brewing cycle will alter the flavor of the finished
pot. When the brewing cycle is completed, five beeps will sound. Coffee
will continue to stream from the filer for several seconds. After
brewing, the unit will automatically shut itself off. The thermal carafe
will keep the coffee hot for hours.
Making Coffee with Pre-Ground Beans

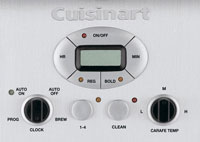
Simple operation control panel
- Fill the Water Reservoir:
Open the reservoir lid. Pour the desired amount of water in the
reservoir using the water level window indicator. Close the reservoir
lid. Note: Do not exceed the 12 cup line; doing so may cause the carafe
to overflow.
- Add Coffee Grounds:
- Open filter door. Add ground coffee to the permanent or #4 paper filter.
- Place filter basket lid in place and close filter door.
- Brewing:
- Immediate Grinding and Brewing:
- Press the Grind Off button. When this function is activated, an amber LED will be illuminated.
- Press the On button. The indicator will light and the process will begin.
- Programmed Brewing:
Press the Program button. The indicator will light and the
display will show the programmed time for as long as the button is
depressed. The display reverts back to the time of day once the button
is released.
- Press the Grind Off button. When this function is activated, an amber LED will be illuminated.
- The coffeemaker will begin brewing at the programmed time.
For additional product information, see the reference manual above.


